
Friday, May 31, 2013
Better than Google
It is no secret that when I have a gardening question, a Google search is usually my first (and often, last) resource. But I have recently discovered a gardening website that provides even better, more focused, expert information: Gardening Know How. You can search virtually any gardening question there, as well as see popular questions asked by other gardeners. And if you don't find what you are looking for, you can can submit your own question to be answered. And there are pictures! I highly recommend it.

Wednesday, May 29, 2013
First salad of the season! (or, how to make tofu croutons)
I think it is fair to assume that all of humanity can be divided into two groups - those who have an interest in something called "tofu croutons," and those who do not. So I thought I'd be real upfront for those of you who don't, just so you know that buried within this post is information about this thing I've decided to call tofu croutons. Don't shoot the messenger, carnivores. You were warned.

The other night for dinner I decided to harvest some of the mesclun mix that is ready to eat. I'd just bought some gorgeous looking strawberries and decided to incorporate the two into a salad. Balsamic vinegar is a natural accompaniment to both salad and strawberries, so I mixed up a makeshift "balsamic vinaigrette" out of balsamic vinegar, olive oil, a little lemon juice, salt, and freshly ground black pepper.
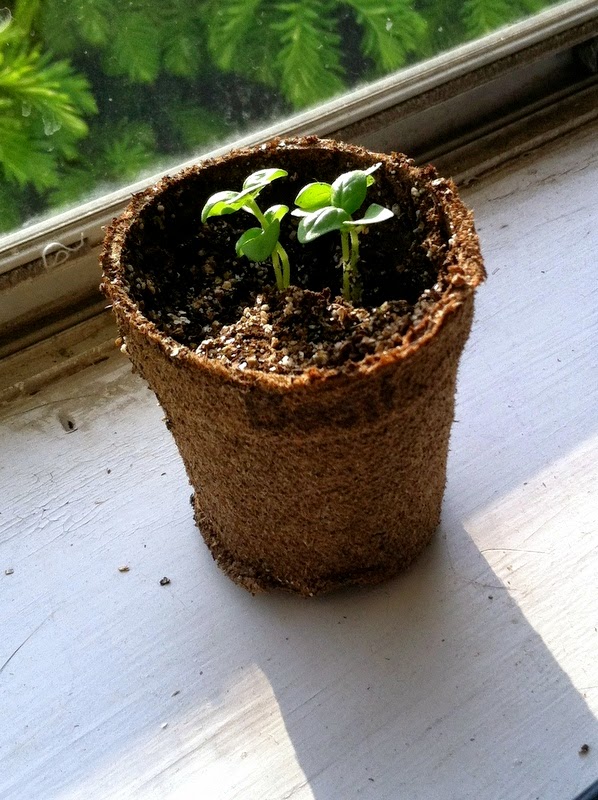
I really would have loved to add some fresh basil, but as you can see in the picture, that plant is not quite ready for consumption! So instead I settled for a little mint.

The salad was pretty, but nutritionally was not offering much as a dinner. Enter the tofu croutons! To turn my block of extra firm tofu into crispy croutons, I followed the following steps (note that from start to finish this is a solid hour-and-a-half, so plan accordingly):
When in doubt, Google "tofu marinade" for inspiration!
The other night for dinner I decided to harvest some of the mesclun mix that is ready to eat. I'd just bought some gorgeous looking strawberries and decided to incorporate the two into a salad. Balsamic vinegar is a natural accompaniment to both salad and strawberries, so I mixed up a makeshift "balsamic vinaigrette" out of balsamic vinegar, olive oil, a little lemon juice, salt, and freshly ground black pepper.
I really would have loved to add some fresh basil, but as you can see in the picture, that plant is not quite ready for consumption! So instead I settled for a little mint.

The salad was pretty, but nutritionally was not offering much as a dinner. Enter the tofu croutons! To turn my block of extra firm tofu into crispy croutons, I followed the following steps (note that from start to finish this is a solid hour-and-a-half, so plan accordingly):
- Open and drain a package of Extra Firm Tofu
- Place between two plates with a heavy object on top (I used our juicer, since it was sitting on the counter anyway). Leave for about 30 minutes -- this will press out any extra liquid and allow the tofu to better absorb the marinade.
- Cut tofu into chunks (mine were about 3/4 inch cubes).
- Toss the tofu in either your own or store-bought balsamic vinaigrette dressing. Allow to sit in a shallow pan or baking dish for another 30 minutes.
- Preheat oven to 400 degrees.
- Spray a baking sheet with some type of non-stick cooking spray (I used olive oil spray)
- Scatter tofu pieces on the sheet, and bake for 20 minutes on middle or upper rack.
- After twenty minutes, check for crispness. At this point, the "croutons" are cooked, but mine were still soft so I returned to the oven for another 20 minutes. I like them very crisp on the outside. You may want to set your timer in 5- or 10-minute intervals to be on the safe side.
- When they meet your established level of crispy-ness, remove from oven and allow to cool slightly. Enjoy as a snack, on a salad, or in a stir fry. I've also added them to soup.
When in doubt, Google "tofu marinade" for inspiration!
Monday, May 27, 2013
Tomatoes on the Move
Last week and this past weekend were filled with garden activity! I gradually moved most of my seedlings into the outdoor garden bed. It was between 6 and 7 weeks from planting to transplanting for most of them. I started with the tomatoes, as they were the biggest.
Dan suggested that 8 seemed like too many, so I managed to limit myself to 10 (see how that math worked?) 4 of these are San Marzano, 3 are Cherokee Purple, 2 are German Johnson, and 2 are German Green. Per the advice of my gardening class, I planted the tomatoes on an East-West line, with the shorter plants (San Marzano) in the front.

Even the "biggest" seedlings looked teeny tiny when planted outside. For each plant, I dug a hole about 4 inches deep, threw some compost in the bottom, and then gently added the plants, keeping them in their peat pots, which will eventually just become part of the soil. I watered them right after the transplanting, and made sure to keep them watered as we went through a hot spell with no rain.
Eventually I will add the same twine lattice system here that I used for the peas and cucumbers, but I figure I can put that off until the plants are a little taller.
 |
| This photo is a little color-enhanced so you can see the plants better. In case you thought it was actually that bright in Ohio. |
Dan suggested that 8 seemed like too many, so I managed to limit myself to 10 (see how that math worked?) 4 of these are San Marzano, 3 are Cherokee Purple, 2 are German Johnson, and 2 are German Green. Per the advice of my gardening class, I planted the tomatoes on an East-West line, with the shorter plants (San Marzano) in the front.

Even the "biggest" seedlings looked teeny tiny when planted outside. For each plant, I dug a hole about 4 inches deep, threw some compost in the bottom, and then gently added the plants, keeping them in their peat pots, which will eventually just become part of the soil. I watered them right after the transplanting, and made sure to keep them watered as we went through a hot spell with no rain.
Eventually I will add the same twine lattice system here that I used for the peas and cucumbers, but I figure I can put that off until the plants are a little taller.
Sunday, May 26, 2013
Sunday centerfold
 |
| This elegant display is the result of a neglected sage plant that has been allowed to flower. When I trimmed it, I thought these were worthy of a photo. And they smell like Thanksgiving! (click to see another use for this "vase") |
Friday, May 24, 2013
Fernando Friday!
I know, it's been a little while since I've featured Fernando. But don't worry, the little man is still working hard at this plant-watching assignment, in ways productive...
 ,,,and not

His brother, on the other hand, could not be less interested in this project.


His brother, on the other hand, could not be less interested in this project.

Wednesday, May 22, 2013
Salad, anyone?
A lot can happen in 2 weeks!
Some definitely take longer to grow than others, but everything I have planted is coming along! I've continued to add more rows every 1-2 weeks, and once I harvest any of these greens I will plant more in their place.
Here are my notes from the gardening class - I just reviewed these today to remind myself of the details of cutting, since I think the salad will probably get eaten in the next 2 weeks or so:
 I think that based on this advice, I can really squeeze a few more rows in between... I've probably been planting them 4-5 inches apart rather than the recommended 2 inches. The point is that if you eat these as "baby" greens, they don't need a lot of room to grow, and definitely don't need the space indicated on the seed packet.
Also, despite the fact that many greens aren't very tolerant of heat and can become bitter-tasting, if you don't grow them to full size (as noted above, cutting when they are 4-5 inches tall), you can actually enjoy them all summer.
Greens can also be grown easily in a container since they have hardly any root system. I think they would do really well in a window-style box (you know, the oblong ones) and you could probably manage 2-3 rows at a time. Considering a bag of this stuff in the grocery store averages about $1.99, and a packet of seeds could be found for much less, it is worth a try!
 |
| The salad bar, 5/8/13 |
 |
| The salad bar, 5/22/13 |
Here are my notes from the gardening class - I just reviewed these today to remind myself of the details of cutting, since I think the salad will probably get eaten in the next 2 weeks or so:

Also, despite the fact that many greens aren't very tolerant of heat and can become bitter-tasting, if you don't grow them to full size (as noted above, cutting when they are 4-5 inches tall), you can actually enjoy them all summer.
Greens can also be grown easily in a container since they have hardly any root system. I think they would do really well in a window-style box (you know, the oblong ones) and you could probably manage 2-3 rows at a time. Considering a bag of this stuff in the grocery store averages about $1.99, and a packet of seeds could be found for much less, it is worth a try!
Monday, May 20, 2013
Cucumber angst
This is my first attempt at growing cucumbers - if you don't count two years ago when I planted seedlings and one of our neighborhood grazers came by and ate all of them within 3 days... because those really didn't get the chance to grow. And so far I am finding them to be a phenomenal pain in the neck.
Yes, I started my seeds too early. Yes, I put them out too early. And yes, as feared, that group of seedlings got all weird and yucky looking after the near frost we had the other night. (I suppose this is as good a time as any to mention that we did not have a true frost, but it did get really chilly... and within 2 days the temperatures were up to near 80 degrees. This is a crazy planet sometimes.)
So, once the temperatures got nice and warm last Saturday (5/18), I went ahead and transplanted the remaining two seedlings outside. Why? Because they were also starting to look weird. Pale. A little yellow. I don't feel very good about their fate. Plus, I know that in attempting to transplant them, I was risking ruination of their delicate little root systems.


So then I decided to just plant a whole row of seeds, in the hopes that some of these might turn into cucumbers. Someday. Fingers crossed.

I found some info here that makes me feel like it's just the weather that is my problem. Even the seedlings on the porch, though it is enclosed, were exposed to colder temps than normal the other night. The ones outside, despite their cozy bedsheet, probably did not stand a chance. The OSU Extension website is a great source of information, especially because it is geared towards my local growing zone.
Sunday, May 19, 2013
Sunday centerfold
We are so in love with our rose bush.


 So much so that I even used one to decorate a cake! (but I was too stingy to sacrifice more than one)


 |
| (the recipe that inspired this beauty can be found here) |
 |
| With the right photo effects, you can blur a messy kitchen into oblivion! |
Monday, May 13, 2013
Oh, snap!
I was so ready to publish some pictures of the cute little pea plants reaching their way up to the sky. See how much they have grown?


I was then planning to express some concern over the state of the cucumber plants. It's been chilly and they don't look too healthy to me. See how the edges are a little curled?
 But, as it turns out, there are more pressing things to discuss, like the fact that it is May 13 and tonight we are under a "Freeze Warning."
 So instead of doing whatever else I may have done when I got home from work today, I had to tuck my plants in for the night in a desperate attempt to save them from the frost. Honestly, I'm not sure the peas need it, as they are pretty cold tolerant. And I'm not sure the cucumbers weren't already beyond help... so it may or may not have been necessary, but it's done:
 But seriously? The frost free date is supposed to be in 2 days!


I was then planning to express some concern over the state of the cucumber plants. It's been chilly and they don't look too healthy to me. See how the edges are a little curled?


Sunday, May 12, 2013
Sunday centerfold
 |
| Remember the buds on the apple trees from last week? A lot can happen in a few days! |

 |
| Check out this beauty from our new rose bush! |
Friday, May 10, 2013
Seeds, Week 5
At this point, the seedlings seem to be taller every time I check on them! Some of the tomatoes (foreground) are 4-5 inches tall.


Wednesday, May 8, 2013
Salad bar, 2013 edition
Slowly but surely, the greens are a-growin'. I'm trying to do some succession planting in this area so we have a never ending supply for salads. Basically, all succession planting means is that you plant (approximately) every 2 weeks. This is about 4 weeks' worth, and it's all muddy because I watered it before remembering to take a picture. But you get the general idea...
 |
| This is a combination of mesclun salad mix (rows 2 and 3), spinach (row 1), and kale (row 4). Above and below the kale I recently planted some swiss chard, but no growing action just yet. |
Monday, May 6, 2013
Cucumbers, Round 1
I say "Round 1" with the full knowledge that these cucumbers may not make it. This is actually the first time I have tried to grow cucumbers. It is quite early to have moved them outside, but they were outgrowing their little peat pots, so why not try? I can easily start some more seeds if these don't make it, but it seemed worth a shot.
 I set them up adjacent to the peas, with an identical stake-and-twine lattice system. These cucumbers are the pickling type, so they will be a little smaller and hopefully something I can get away with growing vertically (otherwise they spread over a very large portion of the ground). My gardening class and several websites and gardening books have led me to believe this is possible.
 Another tip I learned from the gardening class is that the roots of cucumbers (and any other squash plants) are very, very delicate and you have to be extra careful when transplanting the seedlings so as not to disturb the roots. The roots on these guys were pretty well adhered to the peat pots (and growing through the small hole at the bottom) so the process of removing them delicately was a little tough. By which I mean... it is very possible these were not all handled as gently as was necessary. So, one more strike against these cucumber plants' possible future.


Sunday, May 5, 2013
Sunday centerfold(s)
 |
| Surprise tulips from 2 years ago! |
 |
| Buds on our Macintosh apple tree |
 |
| Buds on our Golden Delicious apple tree (I have no idea why the buds on the yellow apples are red, do you?) |
Friday, May 3, 2013
Seeds, Week 4
They really are growing up!

My little seedlings are officially too tall for the lid to fit on their "greenhouse." Which means: a) I really don't need those glasses of water, as they are no longer serving a purpose, b) I have to keep a better eye on whether they are getting too dried out and c) they are tall enough so that I can tell if they start bending towards the sun. A good reminder to rotate the tray every other day or so. At the rate they are growing, it seems reasonable to move them outside on or just shortly after May 15. (Unless, of course, there is another frost, which is seriously always possible in the ridiculous climate of Northeast Ohio. I feel like "frost free" is more of a suggestion in these parts, not any kind of guarantee. I'll keep my fingers crossed.)

My little seedlings are officially too tall for the lid to fit on their "greenhouse." Which means: a) I really don't need those glasses of water, as they are no longer serving a purpose, b) I have to keep a better eye on whether they are getting too dried out and c) they are tall enough so that I can tell if they start bending towards the sun. A good reminder to rotate the tray every other day or so. At the rate they are growing, it seems reasonable to move them outside on or just shortly after May 15. (Unless, of course, there is another frost, which is seriously always possible in the ridiculous climate of Northeast Ohio. I feel like "frost free" is more of a suggestion in these parts, not any kind of guarantee. I'll keep my fingers crossed.)
Wednesday, May 1, 2013

Subscribe to:
Posts (Atom)